
Pi-Hole: The DIY ad-blocker & malware defender all in one box
The Raspberry Pi is a fantastic tool for anyone who wants to dabble in all sorts of PC-related activities. Every home should have at least one Raspberry Pi – they are so versatile. I’ve given homes to 6 Pi’s over the last few years and use them for all sorts of things.
Released initially in 2012 as a credit-card-sized SoC (system on a chip), the Raspberry Pi quickly gained a massive following of budding programmers and engineers eager to build projects based on the ARM processor.
Over the years, thousands of projects have been released online for others to follow suit. Some involve a hefty amount of coding, others utilise the GPIO pins and electronics, and others just involve downloading some pre-created apps.
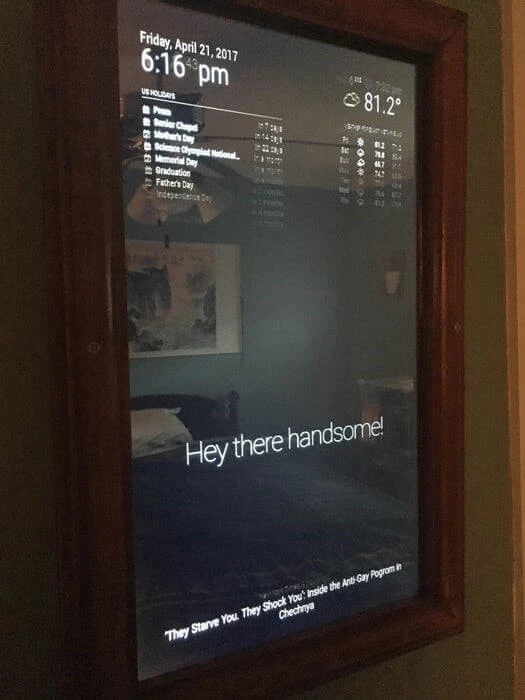
One of the most interesting projects I have come across is the Magic Mirror project – essentially a monitor screen behind a piece of one-way glass to create a mirrored surface that can reveal images and text behind the mirror when displayed by the Pi.
What started out a one-man project very quickly became a massive user-driven internet success with many others contributing to the code-base, enabling many new features, including smart-speaker integration.
However, one project seems to dwarf all others in terms of the number of users – the Pi-Hole.
What is the Pi-Hole?
The Pi-Hole is a DNS proxy that compares the DNS requests from devices against a set of Deny lists to determine whether to send the request to the internet or not.
The result is an almost ad-free web surfing experience, plus a much safer browsing time since you can also add known malicious domains to the deny lists too.
To get started with a Pi-Hole, you first need a Raspberry Pi – actually, that’s not strictly true, you can install the software on any Linux system, including a Virtual Machine, or even a docker container, but then it wouldn’t be called a Pi-Hole, would it?
Anyway – assuming you are building a Pi-Hole on an actual Raspberry Pi, it’s a simple task of running the following command:
curl -sSL https://install.Pi-Hole.net | bash
This will download the installation files required and pipe them directly to Bash for installation. Now, some people might not like this idea as it doesn’t allow you to inspect the code before execution, so for those more security-minded ones, the alternative is almost as simple:
wget -O basic-install.sh https://install.Pi-Hole.net
sudo bash basic-install.sh
Once installed, the Pi-Hole will be ready to run, however you will now need to configure your devices to use your Pi-Hole as their DNS server. All the configuration is done via a very user-friendly web interface, so just fire up the browser, log in to the dashboard and have a play.
Depending on your set-up, you might be able to configure the DHCP service on your router to hand out the IP address of your Pi-Hole to clients, or alternatively you can configure a DHCP service on the Pi-Hole to do this very thing – you will just have to disable the DHCP on your router to avoid conflicts.
And that’s it... well, almost.
Pi-Hole deny lists
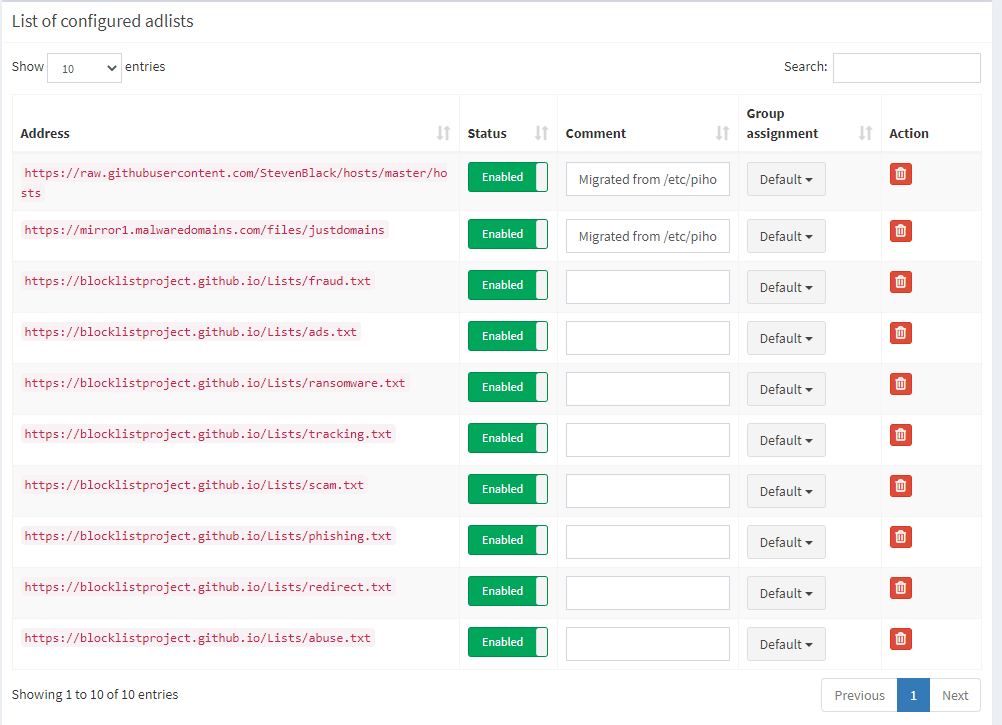
Out of the box, the Pi-Hole has a very comprehensive deny list that will block most advertising platforms from bombarding you with ads, but there is a huge community of users online who publish even bigger lists to block the ever-changing vista of ads and malware being hosted online, so it might be advisable to import some of those lists.
Below is a screenshot of my Pi-Hole dashboard where you can see I’m currently blocking over 1M domains from being contacted by devices in my network.

I have supplemented my default deny lists with a few others as you can see in the screenshot below:
Since building my Pi-Hole, I have become very used to browsing the web in an almost ad-free way, so much so that I simply cannot stand browsing the web on any other network – the ads are so intrusive.
That’s why I have used another Pi to build a VPN service so that whenever I’m away from home, I can VPN back to my home network, and then surf the web from there, thus continuing to enjoy my ad-free life.
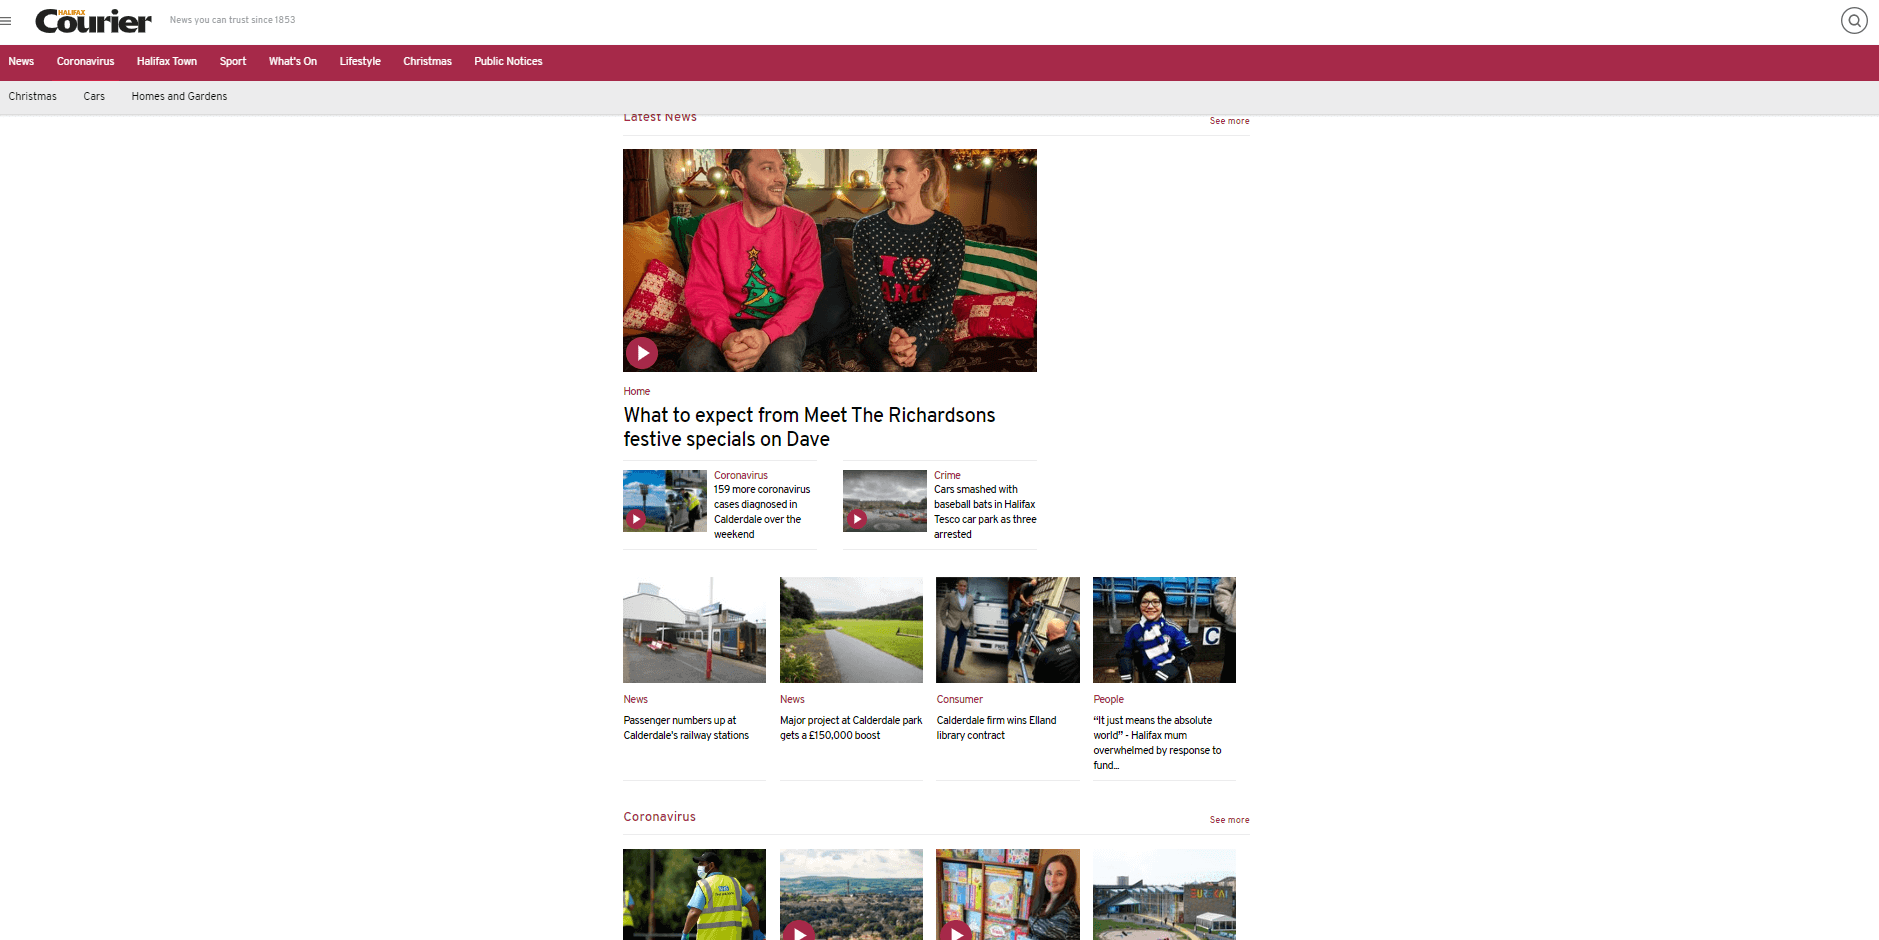
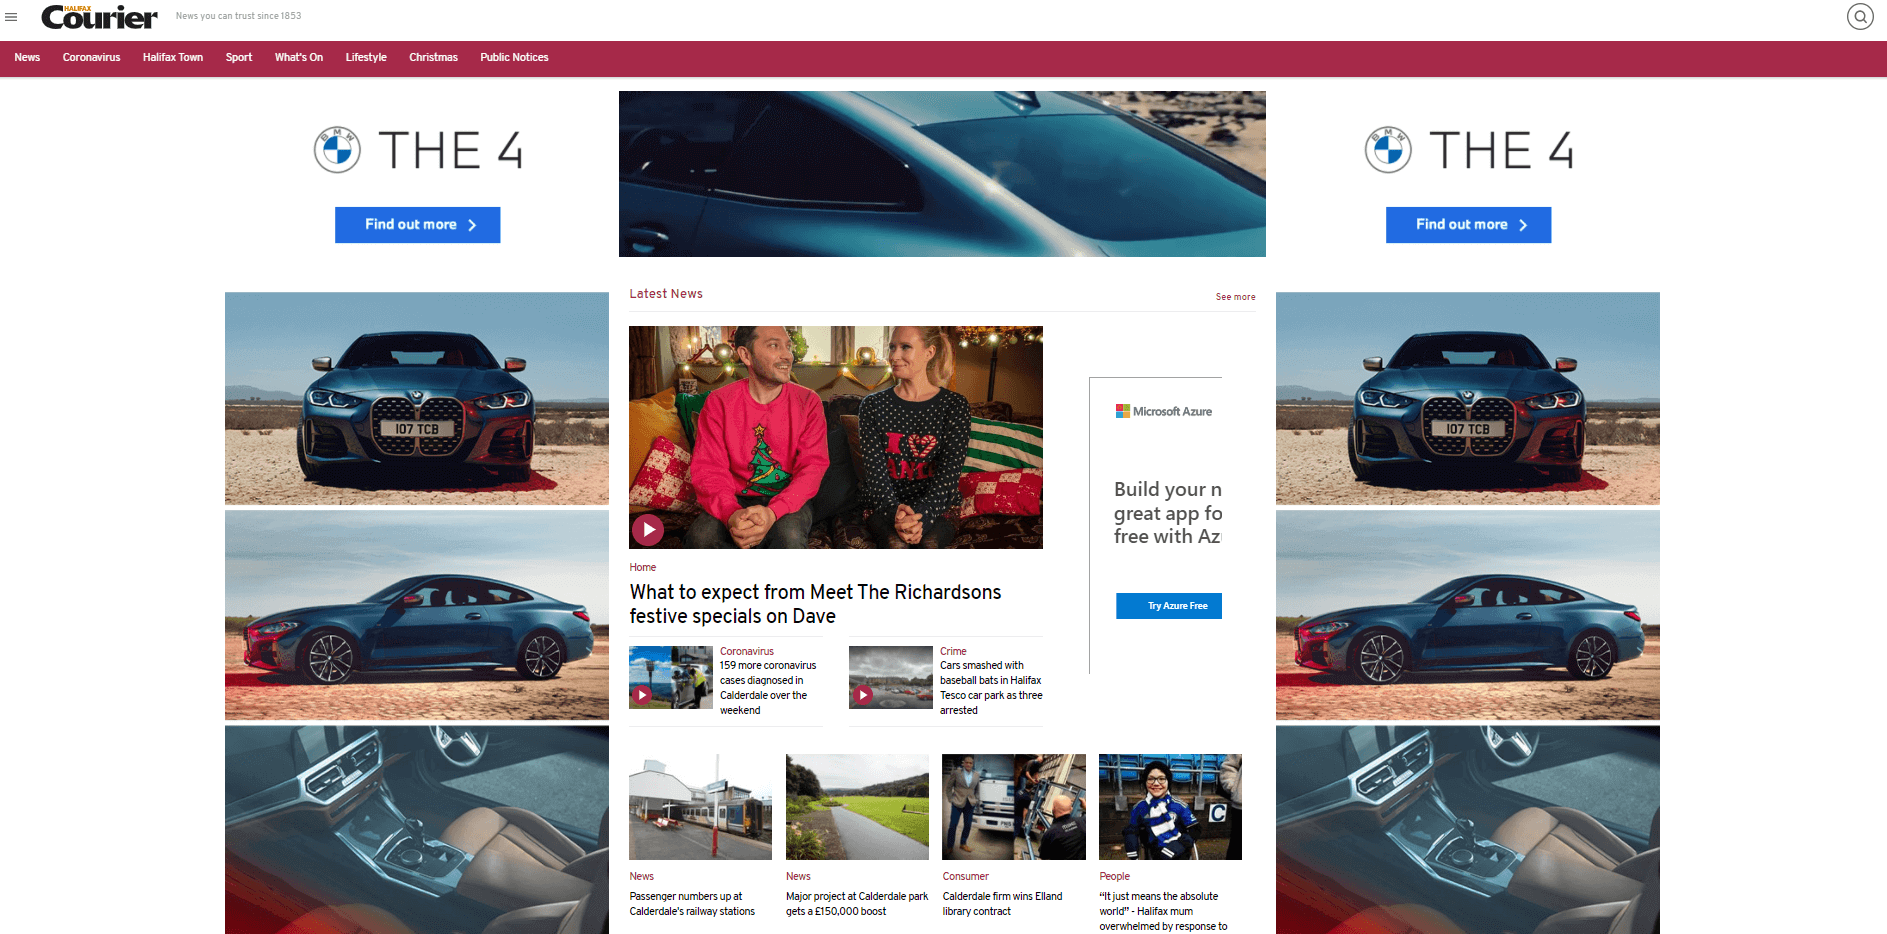
Here are two screenshots of the same website with the Pi-Hole enabled and then disabled so you can see the difference it makes.
Below is the Halifax courier website with Pi-Hole enabled:
The same website with the Pi-Hole disabled:
So, it’s not too late to ask Santa for an extra present this Christmas – instead of stuffing your pie hole with turkey, you can build a Pi-Hole to block those annoying boxing-day ads…
